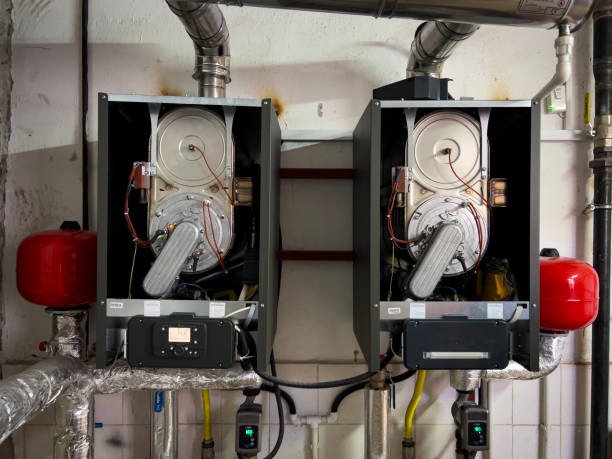
Water Heater Installation in Santan Valley, AZ
Choosing the right water heater and having it installed correctly matters for comfort, safety, and long-term operating cost—especially in Santan Valley, AZ, where hard water, high summer demand, and space-conscious home designs are common. This page explains the full professional installation process for both tank and tankless water heaters, what to expect during site assessment and permitting, the parts and accessories typically required, testing and commissioning steps, and the maintenance and warranty actions that protect your investment.

Why professional installation matters in Santan Valley, AZ
- Local water in the East Valley tends to be mineral-rich, increasing sediment buildup in tank units and scale on tankless heat exchangers. Proper sizing and accessories reduce long-term problems.
- Many homes have limited indoor mechanical space or garage installations; correct placement, venting, and drainage are essential to meet code and avoid moisture problems.
- Gas supply, venting routes, and electrical availability influence whether a gas, propane, electric, or tankless unit is the best choice for your home.
Common water heater types and common issues in Santan Valley
- Tank water heaters (gas or electric): simple, reliable, but susceptible to sediment build-up, anode rod depletion, and reduced efficiency over time.
- Tankless (on-demand) units: compact and energy-efficient for continuous hot water, but require proper water quality management and correct gas/electrical service sizing.
- Common local issues: mineral scaling, reduced flow due to long hot water lines for sprawling single-story homes, and deteriorating anode rods in older tanks.
Initial site assessment and code/permit overview
A professional installation begins with a thorough site assessment:
- Evaluate current unit location, available gas or electrical capacity, ventilation paths, water line access, and space for required accessories (pan, expansion tank).
- Check local building and plumbing code requirements and identify necessary permits and inspections. Santan Valley projects typically require municipal or county permits and a final inspection to ensure safe gas and vent installations and proper discharge routing.
- Review water quality (hardness) and hot water usage patterns to recommend tank size or tankless flow rate and potential water-treatment options.
Installation process — step by step
- Pre-install planning
- Confirm the selected model, required venting, gas or electrical service, and accessory list.
- Verify permits are approved or in process.
- Site preparation
- Disconnect power and gas safely, drain existing tank (if applicable), and remove the old unit following safety and disposal protocols.
- Prepare mounting or platform if needed; install or verify presence of floor drain or drain pan.
- Rough-in and connections
- Install water lines with proper shutoff and dielectric unions, install gas piping sized to code and include a sediment trap where required.
- For tank units: set tank, connect cold and hot lines, install temperature and pressure relief (T&P) valve with correct discharge piping, and add an expansion tank if required by local code or if a closed domestic water system is present.
- For tankless: mount unit to wall, complete venting (or condensate drain for condensing models), connect water and gas/electric, and install a sediment trap and water softening/descaling device if recommended.
- Venting and combustion air (for gas units)
- Install vent pipes per manufacturer and local code, check clearances, and ensure adequate combustion air.
- Final hookups and safety features
- Install drain pans, overflow routing, seismic straps if required, pressure relief discharge piping, and isolation valves for easier future servicing.
Required components and recommended accessories
- Required: T&P valve and discharge piping, proper venting materials, sized gas line or electrical circuit, shutoff valves, drain pan if located indoors.
- Strongly recommended: expansion tank for closed systems, dielectric unions to prevent corrosion, anode rod (tank) inspection or replacement, sediment trap on gas lines, condensate neutralizer (condensing tankless), and a recirculation pump for homes with long hot-water runs.
- Water treatment: a water softener or scale inhibitor is often recommended in Santan Valley to protect tanks and tankless units from mineral damage.
Testing and commissioning procedures
A complete commissioning ensures safety and reliable operation:
- Leak test: inspect all water, gas, and vent connections under operating pressure.
- Combustion and vent flow checks for gas units: verify proper flame characteristics and safe exhaust routing.
- Temperature and thermostat calibration: confirm water reaches set point and safety limits operate.
- Safety devices: test T&P valve operation, verify expansion tank pressure, and check electrical bonding/grounding.
- Final inspection documentation: prepare the paperwork required by local authorities for final permit sign-off.
Post-installation maintenance plan and warranty registration
- New installations should include a clear maintenance schedule: annual inspection and flush for tanks, descaling and filter/strain cleaning for tankless units (frequency depends on water hardness), T&P valve check, and anode rod inspection every 2–4 years.
- Recommend registering manufacturer warranties and saving installation paperwork and serial numbers in a safe place. Documenting professional installation and permit sign-off often protects warranty coverage.
- Consider a preventive maintenance agreement tailored to Arizona conditions to maximize lifespan and efficiency.
Typical timelines and cost factors
- Typical timelines: initial site assessment and quote within days; permit approval and scheduling vary by municipality but often take several days to a few weeks; actual installation is commonly completed within a day for straightforward tank replacements or 1–2 days for tankless or complex venting/gas upgrades.
- Factors that impact cost (no prices listed here): fuel type (gas vs electric), tank vs tankless technology, venting complexity, gas line or electrical upgrades, required accessories (expansion tank, water treatment), location of unit and accessibility, and permit/inspection requirements.
How scheduling and preparation usually work
- Prepare by knowing the current water heater location, fuel type, current utility capacity, and typical household hot-water usage.
- Expect the installer to review permit status, discuss recommended options for water treatment or accessories, and outline the installation timeline and what to expect during the day of service (power/gas shutoff, water shutoff periods, noise and removal of old unit).
- After installation, expect documentation for warranty registration and guides for routine maintenance.
Professional water heater installation balances safety, code compliance, and long-term performance—especially important in Santan Valley where water quality and home layouts affect system longevity. Proper assessment, the right accessories, thorough testing, and a clear maintenance plan protect your household from unexpected failures and ensure dependable hot water for years to come.


