


Ductless Installation in Queen Creek, AZ
Ductless installation experts in Queen Creek, AZ deliver precise climate control with minimal wall disruption. Learn steps and benefits.
Ductless Installation in Queen Creek, AZ
Ductless installation is a practical, high-performance solution for Queen Creek homes and small businesses that need targeted cooling or heating without extensive ductwork. With long, hot summers, monsoon dust and rising energy costs, many homeowners in Queen Creek choose ductless mini-split systems to gain faster comfort, better zoning control, and improved efficiency. This page explains what professional ductless installation involves, common local issues, the installation process, and maintenance guidance so you can make an informed decision.
Why ductless makes sense in Queen Creek, AZ
- Efficient cooling for desert heat: Ductless heat pumps deliver conditioned air directly to rooms, reducing energy losses common with ducted systems in older Arizona homes.
- Zoning for varied use: Perfect for garages, additions, bonus rooms, or split-level homes where one zone needs cooling while the rest of the house does not.
- Minimal disruption: Installations require only a small penetration through the wall for the line set, avoiding large demolition or duct retrofits.
- Better indoor air quality: Modern mini-splits include high-efficiency filters that reduce dust and pollen—useful during Queen Creek’s dusty season and monsoon storms.
- Heat pump options: Many ductless units provide both cooling and heating, helpful for cooler winter nights without a full furnace system.
Common ductless systems and typical issues in Queen Creek
- Single-zone ductless mini-splits for a single room or addition
- Multi-zone systems (2–8 indoor heads) that serve several rooms from one outdoor condenser
- Wall-mounted heads, ceiling cassettes, and floor consoles—choice depends on layout and aesthetics
Common issues seen locally:
- Undersized equipment: Overlooking high cooling loads from large sun-facing windows or vaulted ceilings leads to short cycling and higher bills.
- Poor placement: Installing indoor units where airflow is blocked by furniture reduces performance.
- Refrigerant and electrical mismatches: Improper line set length or inadequate electrical capacity causes system faults or poor efficiency.
- Condensate problems: Dust and organic buildup can clog drainage lines, especially during monsoon months.
Typical professional ductless installation process
A thoughtful installation follows a standardized process to ensure long-term performance and compliance:
- Site survey and needs assessment
- Evaluate room dimensions, window orientation, insulation, and occupant habits.
- Discuss desired zones, preferred indoor head styles, and aesthetic considerations.
- Accurate load calculations (Manual J)
- Perform a Manual J calculation to size each indoor unit correctly, accounting for Queen Creek’s extreme summer temperatures, solar gain, and local home construction.
- Equipment selection and placement planning
- Choose single- or multi-zone systems and decide mounting options (wall, ceiling cassette, floor).
- Plan outdoor condenser location for airflow, noise considerations, and sun exposure.
- Mounting and line set routing
- Mount indoor heads on structurally suitable walls or ceilings.
- Run a line set (refrigerant lines, condensate drain, and communication wires) through a small wall penetration; routes are planned to minimize visibility and avoid future maintenance issues.
- Refrigerant and electrical hookup
- Connect outdoor condenser to indoor heads with proper refrigerant charging practices (vacuum, recovery, measure superheat/subcooling).
- Install dedicated electrical circuit, disconnect, and ensure panel capacity; account for high ambient start conditions typical in Queen Creek summers.
- Testing and commissioning
- Verify refrigerant charge, airflow, temperature splits, and operational modes (cooling, heating, defrost).
- Confirm drain lines are pitched and clear, and inspect for leaks or noise.
- Permitting and code compliance
- Obtain necessary permits and follow local code requirements; paperwork often includes equipment specifications and load documents submitted to local authorities when required.
- Handover and homeowner orientation
- Explain controls, filter maintenance, basic troubleshooting, and warranty registration.
What to expect during refrigerant and electrical work
- Refrigerant lines are typically pre-insulated copper routed through a 2.5–3 inch hole, sealed neatly inside and outside.
- Installers will pull a vacuum on the line set to remove moisture and non-condensables before charging with the precise refrigerant amount.
- Electrical work includes installing a dedicated circuit and a local disconnect for the outdoor unit. If the existing panel is full, upgrades or a sub-panel may be required.
- High ambient temperatures can affect startup and charging; professionals account for this when setting refrigerant charge and evaluating performance.
Testing, commissioning, and permitting details
Proper commissioning confirms the system will operate reliably in Queen Creek’s climate:
- Performance checks: Measure airflow, temperature differences, amp draw, and refrigerant pressures to ensure factory performance.
- Operational checks: Verify heat pump defrost cycles (for heating mode), fan speeds, and remote control or Wi-Fi thermostat setup.
- Documentation: Keep a copy of load calculations, permits, and equipment data for future service and potential warranty claims.
Post-install care and maintenance guidance
Routine maintenance preserves efficiency and avoids common local problems:
- Clean or replace filters every 1–3 months depending on dust levels and occupancy.
- Pre-monsoon inspection: Inspect outdoor unit for debris, check drain lines for blockages, and clean coils to prevent efficiency loss during high-humidity storms.
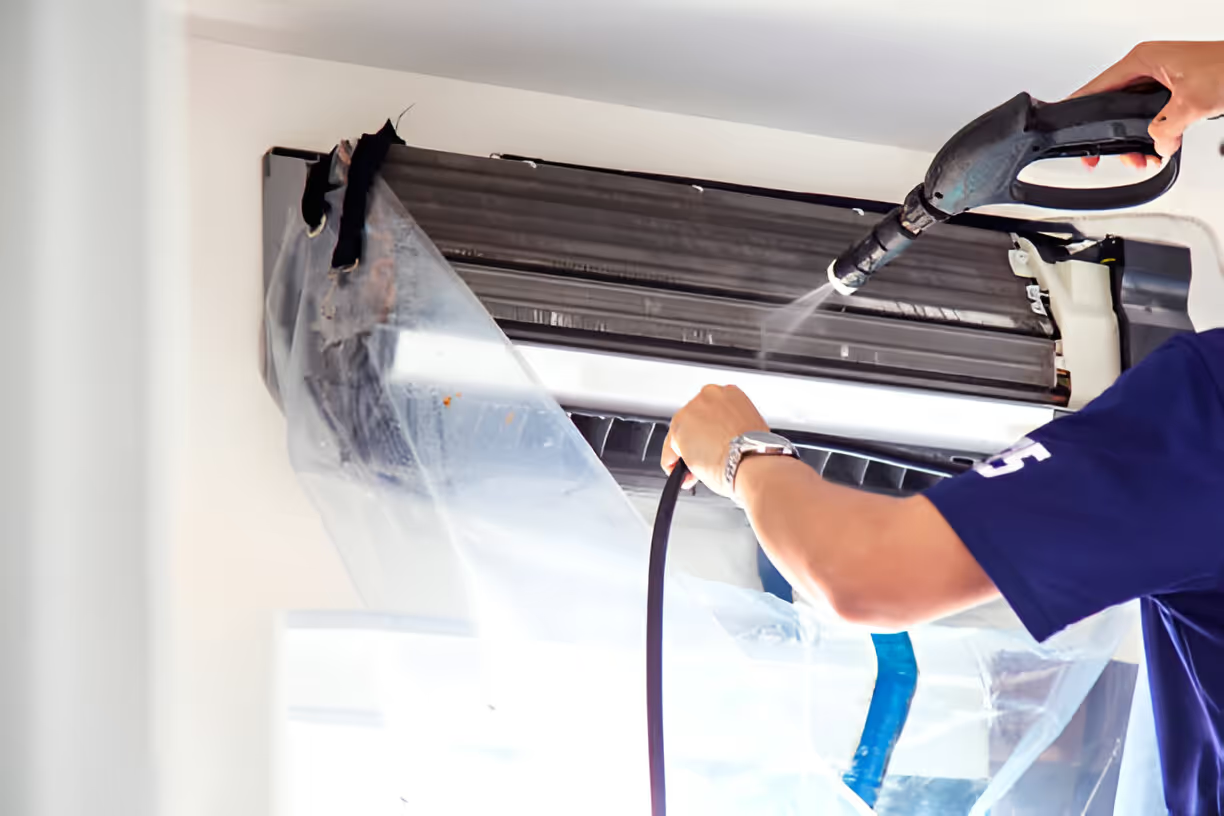
- Annual professional tune-up: Includes refrigerant check, electrical inspection, coil cleaning, and drainage verification.
- Monitor for signs: Reduced airflow, unusual noises, or higher energy bills can indicate refrigerant loss, compressor stress, or clogged filters.
Benefits of timely, professional ductless installation
A correctly installed ductless system delivers:
- Lower energy use compared with poorly sized ducted systems
- Improved comfort with room-by-room temperature control
- Quieter operation and a less intrusive installation process
- Longer equipment life and preserved warranty coverage when installed to code
Choosing a professional approach to ductless installation in Queen Creek, AZ ensures systems are sized for local conditions, installed to meet code, and commissioned to perform reliably in the desert climate. With attention to placement, refrigerant handling, and ongoing maintenance, ductless systems can be a highly effective, flexible option for cooling and heating specific areas of your home.